Spring is just around the corner, bringing longer days, milder temperatures, and an increasing desire to spend time outdoors. If you are lucky enough to have an outdoor stainless steel kitchen, now is the perfect time to get it ready for a new season of lunches, dinners, and barbecues with friends and family! After months of inactivity, your outdoor kitchen requires a thorough cleaning, a careful inspection of appliances, and an optimized organization of space to maximize its functionality, comfort, efficiency, and durability. In this guide, we will walk you through the steps to restore its shine!
Spring Cleaning and Maintenance for Your Outdoor Kitchen: The 3 Essential Steps
If your outdoor kitchen has been unused during the colder months, now is the time to carry out maintenance and deep cleaning before spring arrives—and especially before you start cooking outdoors again.
Step One: Deep Cleaning
Stainless steel is an extremely durable and hygienic material, but to maintain its shine and integrity over time, it requires proper care. After a long period of inactivity, stainless steel surfaces may have accumulated dust, fingerprints, streaks, or small limescale stains, which need to be removed without risking scratches. Use a neutral or stainless steel-specific cleaner, avoiding harsh products containing chlorine or bleach. Wipe the surface with a soft microfiber cloth and dry it thoroughly before moving on to the next step.
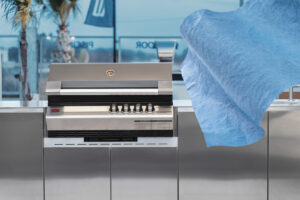
Step Two: Appliance Maintenance
Before you start cooking outdoors, take some time to ensure that all appliances and installations in your outdoor kitchen are in perfect working condition.
If your outdoor kitchen includes a barbecue or a gas or induction cooktop—components that have surely come into contact with grease and food residues—proper post-winter maintenance is essential. First, remove the grates and soak them in warm water with baking soda for at least 30 minutes to dissolve dirt, making it easier to clean with an abrasive sponge. Then, check the barbecue burners or gas cooktop to ensure the holes are not clogged, cleaning them with a needle or thin pin. If you have an induction cooktop, use a specialized glass-ceramic cleaner to avoid streaks and scratches.
If your outdoor kitchen has a sink, make sure the drain is clear and that the faucet is working properly. To prevent limescale buildup, use white vinegar to dissolve any deposits on filters and chrome surfaces.
If your kitchen runs on LPG or natural gas, inspect the pipes to ensure there are no leaks or signs of wear. If you notice cracks or bulging, replace the hose immediately.
If you have electrical installations, check for damaged cables or exposed outlets that could be affected by weather conditions.
Step Three: Space Organization
Once your kitchen is cleaned and your appliances are maintained, it’s time to make your outdoor space not only functional but also inviting. After winter, decluttering might be necessary—getting rid of damaged or rusted pots and utensils, arranging kitchen tools in an easily accessible way, and using airtight containers to store spices, flour, and other ingredients to protect them from moisture and insects. Spring is also the perfect time to refresh the look of your outdoor kitchen: you could add aromatic plants such as basil, rosemary, and mint—not only as decorative elements but also as useful cooking ingredients—install LED lights or solar lanterns to create a warm and welcoming evening atmosphere, or use colorful tablecloths and cushions to bring a lively touch to the space. With proper maintenance and a few simple adjustments, your stainless steel outdoor kitchen will be ready to accompany you throughout the warm season, offering unforgettable outdoor moments with your friends and family.